Feature Friday- Jeweled Pumpkin
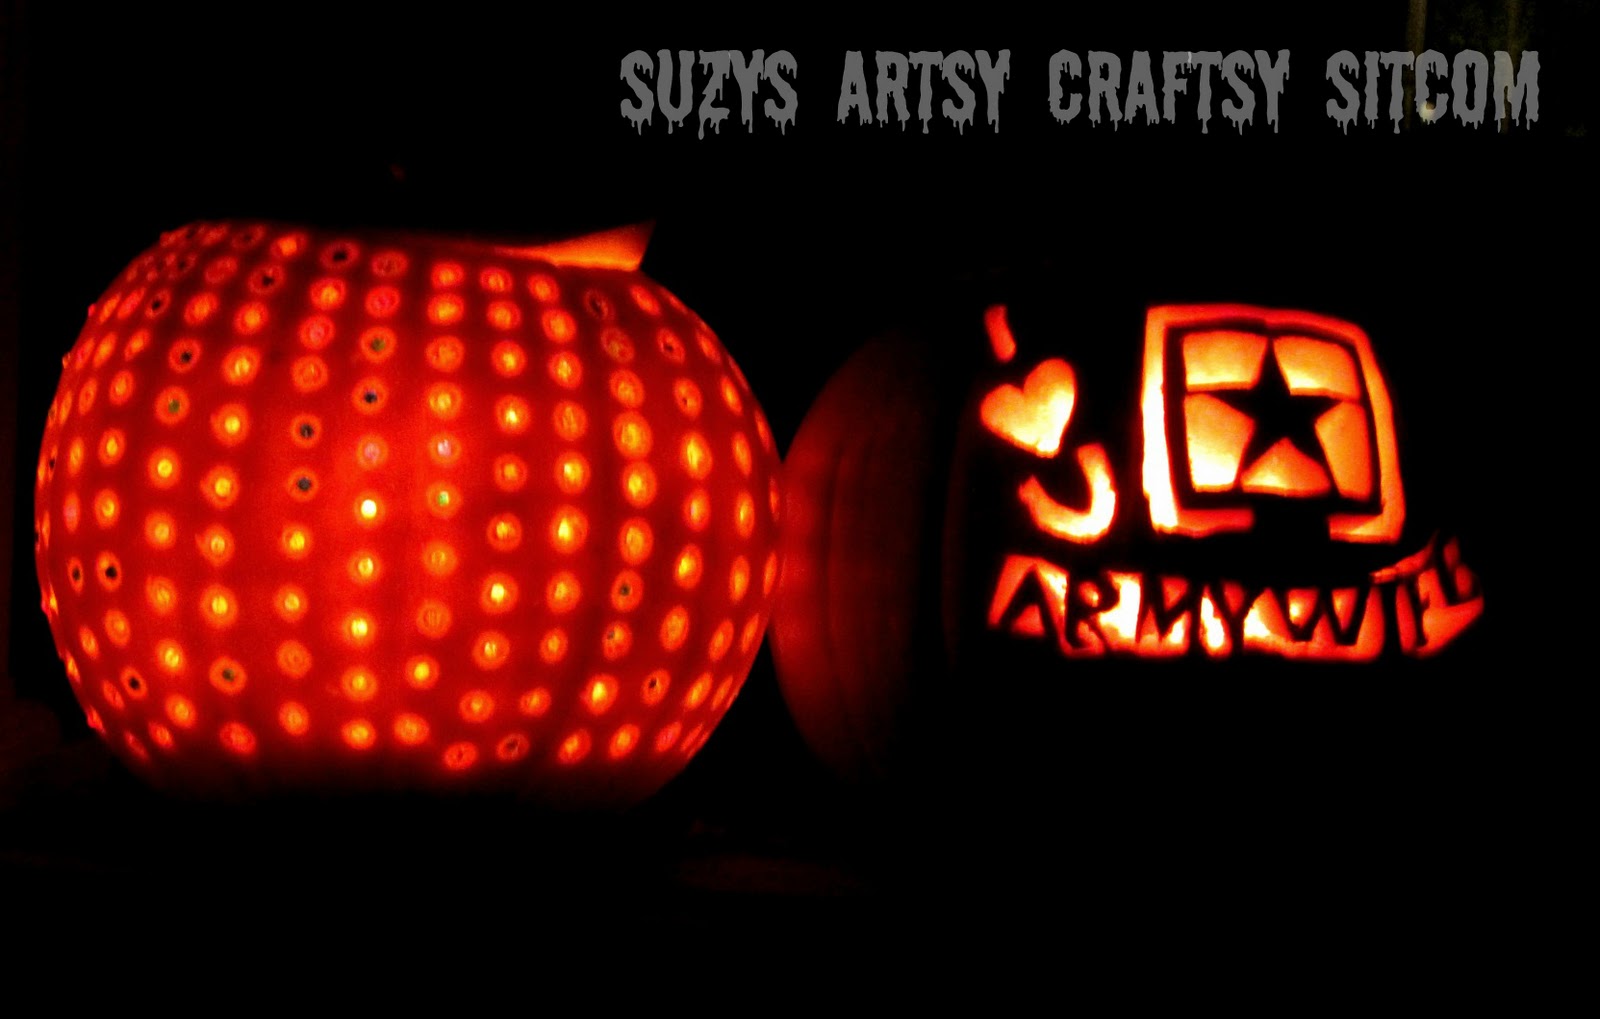
The daughter and I wanted to carve pumpkins this year, and of course we wanted to make ours a bit different. Because that’s the way my family rolls. You certainly can’t expect the norm from us. I have been playing around with the idea of a “jeweled pumpkin” and my daughter wanted to make something to cheer up her hubby who is currently serving in the military.


Of course, carving pumpkins has always been a tradition in our family since the kids were very small. When she was little, she had a bit of issue with the insides of the pumpkin, but as you can see, she has grown out of that.
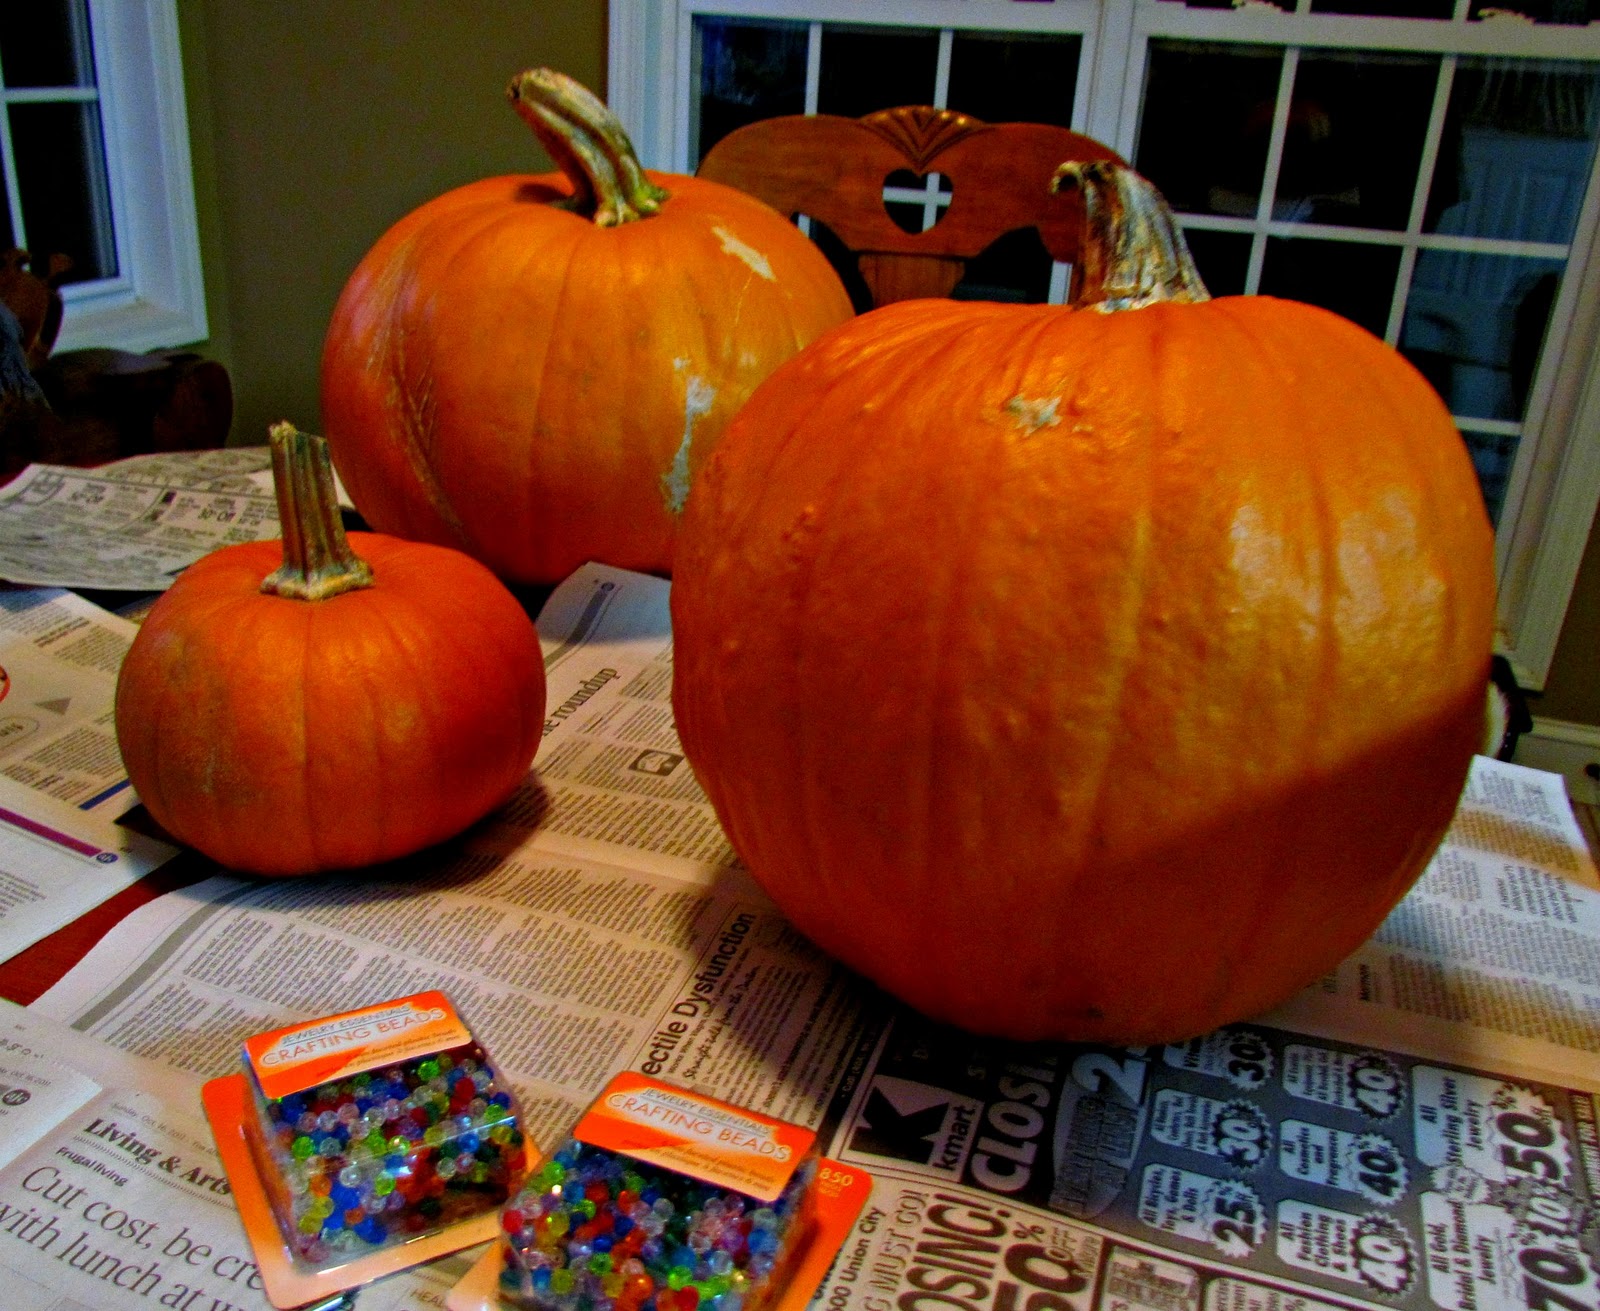
For my jeweled pumpkin project, I used:
A pumpkin (no really)
Plastic transparent beads (20 mm)
Plastic transparent beads (20 mm)
A large nail
And of course some candles
We did the normal cleaning out of the pumpkin thing, being sure to set the seeds aside for another project. When cleaning out the pumpkin, it is best to get rid of as much of the rind on the inside as possible in order to get good light through the beads. I tried to make it about ¼” thick.
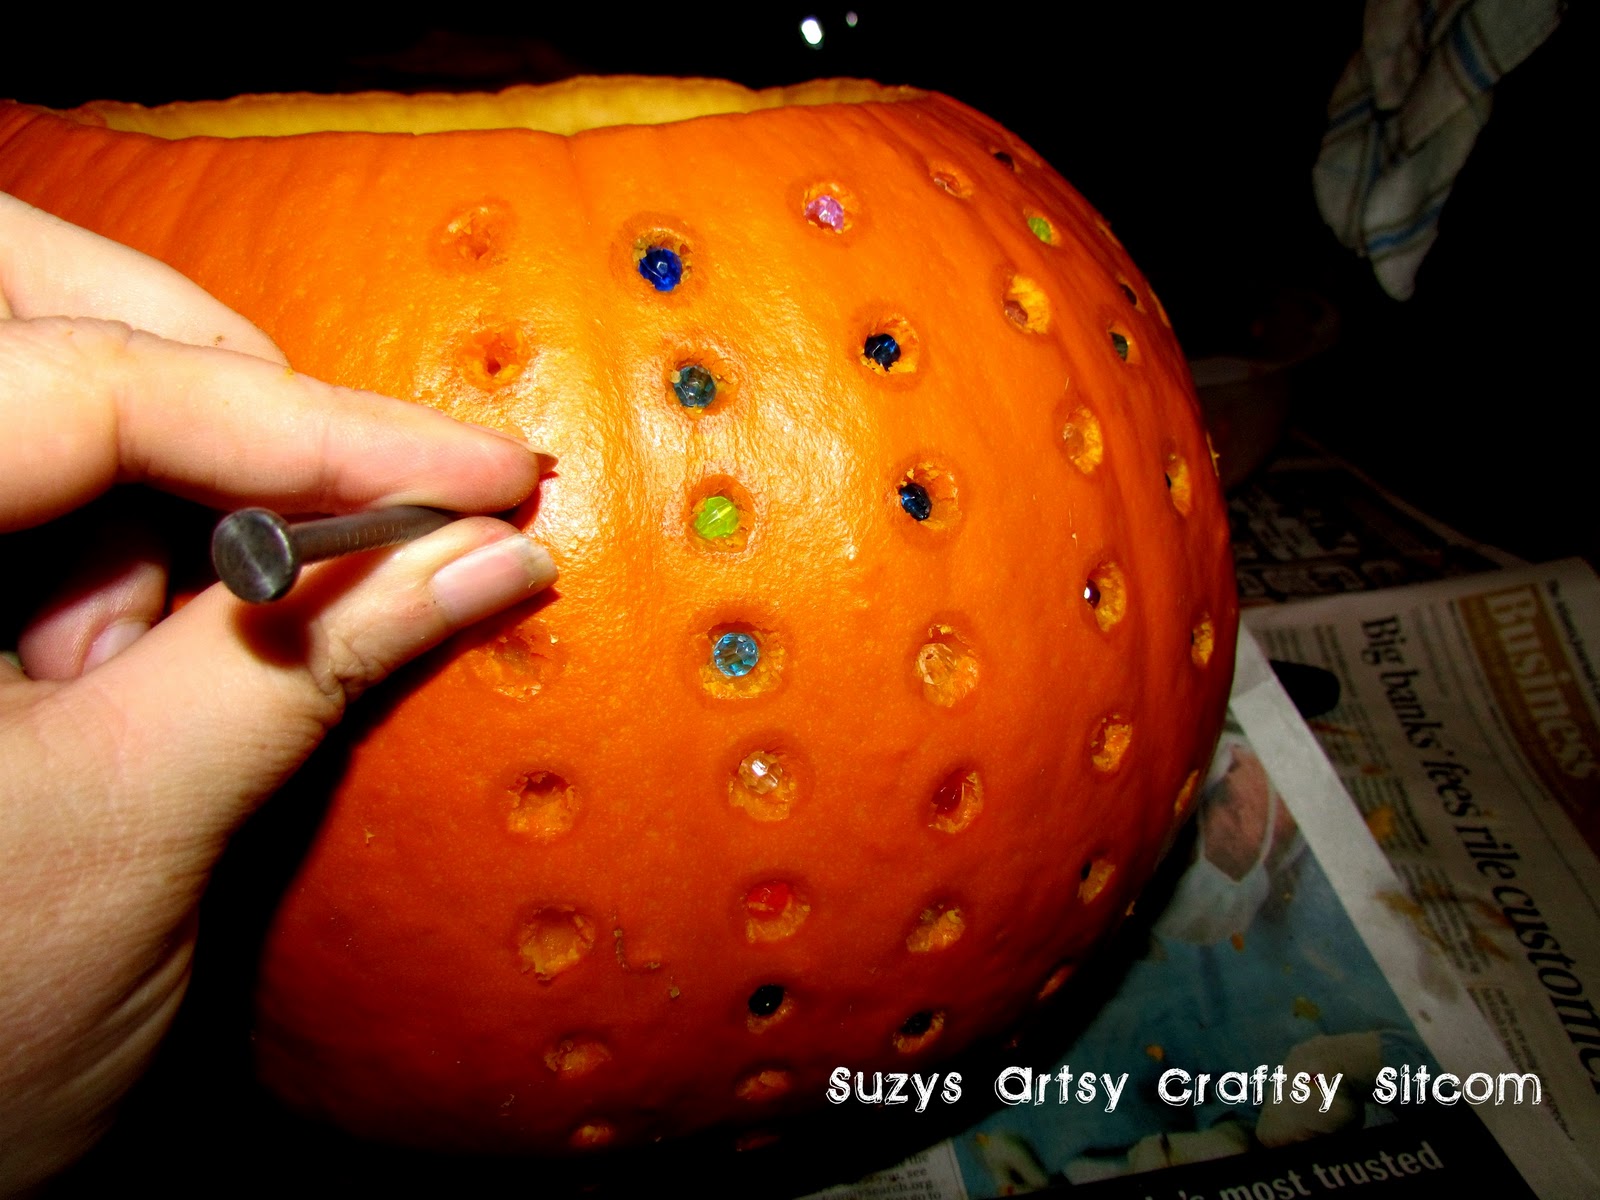 I then used a nail to puncture holes into the pumpkin. I didn’t follow a pattern, just punched holes in lines, but one could certainly add a pattern here. Maybe something in paisley? Hmmm… Anyway, as the rows of holes were punched, I simply pushed into each hole a colored bead. How easy is that?
 Be sure to cut an air hole in the back of the pumpkin so that your candle can get oxygen. I cut mine about 2” x 2” in the very back of the pumpkin and it seems to work well. The finished pumpkin looked more like a disco ball than a pumpkin, but it certainly had an unusual effect. My daughter printed out the army logo on computer paper and pinned it to the pumpkin, using it as a template for her design. She emailed this photo to him and of course he loved it. Very sweet.
 Next week, I’ll show you what we did with the seeds!
_______________________________________________________
If you enjoyed this tutorial, and want to see more Halloween-ness, check out my Witchy Poo Broom tutorial. A cute door hanging that makes use of recycled cans.
Or check out my Marvin the Mummy and Friends tutorial. You will never guess what Marvin is made of!

Just wanted to let you know that I featured your Jeweled Pumpkin! 🙂
I featured this post today on my blog! Thanks for linking up! 😀
http://www.betweenuandme.com
This is very artsy. Love the effect when it is lit.
Hi! This is very cool! I love it! Thanks for sharing this at the Crazy Cute party @ Between U & Me! Don't forget to come back and enter for a chance to win the giveaway! 😀
http://www.betweenuandme.com
That is so adorable. My daughter would love it!
I'm a new follower from Simply Design.
http://www.myhappilyeverafteragain.blogspot.com
Such an inventive idea!
Your pumpkins look great! Why didn't I think of using a nail? Good tip!
These are awesome. My husband loves pumpkin carving!!!
Your little ones are just precious! This is such a great idea, looks like a lot of fun! Thank you so much for sharing with Full Plate Thursday. Hope you have a wonderful week and come back soon!
How fun! That's so creative. Love it!
What a fabulous idea! And there's nothing wrong with it looking like a disco ball! Definitely one to try with my girls!
Thanks for linking to a Round Tuit!
Hope you have a great week!
Jill @ Creating my way to Success
http://www.jembellish.blogspot.com/
What a fun idea!
Love this jeweled pumpkin. Great idea. Thanks for sharing.
This is so cool! I thought they must have been Christmas lights at first but what a great idea!
Ha, I was totally expecting you to say you'd used fairy lights there, I was obviously thinking too technically (and right enough, where would the wires go?!) It looks fab anyway :o)
awsome!!!!
Great idea on the jeweled pumpkin – especially for those of us who do not like to carve!
Simply Artistic 🙂 Have fun Honey *(*